Topics
Introduction to ICT
Creating Textual Communication
- Purpose of Creating Textual Documents
- Word Processor Basics
- Keyboard Functions
- Creating and Formatting a Document
- Saving and Opening Documents
- Text Formatting
- Error Detection Tools
- Cut, Copy and Paste
- Bullets and Numbering
- Tables in LibreOffice
- Inserting Images in LibreOffice
- Headers and Footers
- Print Preview and Printing
- Protecting Documents
Creating Visual Communication
Creating Audio-Video Communication
Presenting Ideas
Getting Connected: Internet
Safety and Security in the Cyber World
Fun with Logic
Slide Show and Arrangement
1. Slide Show
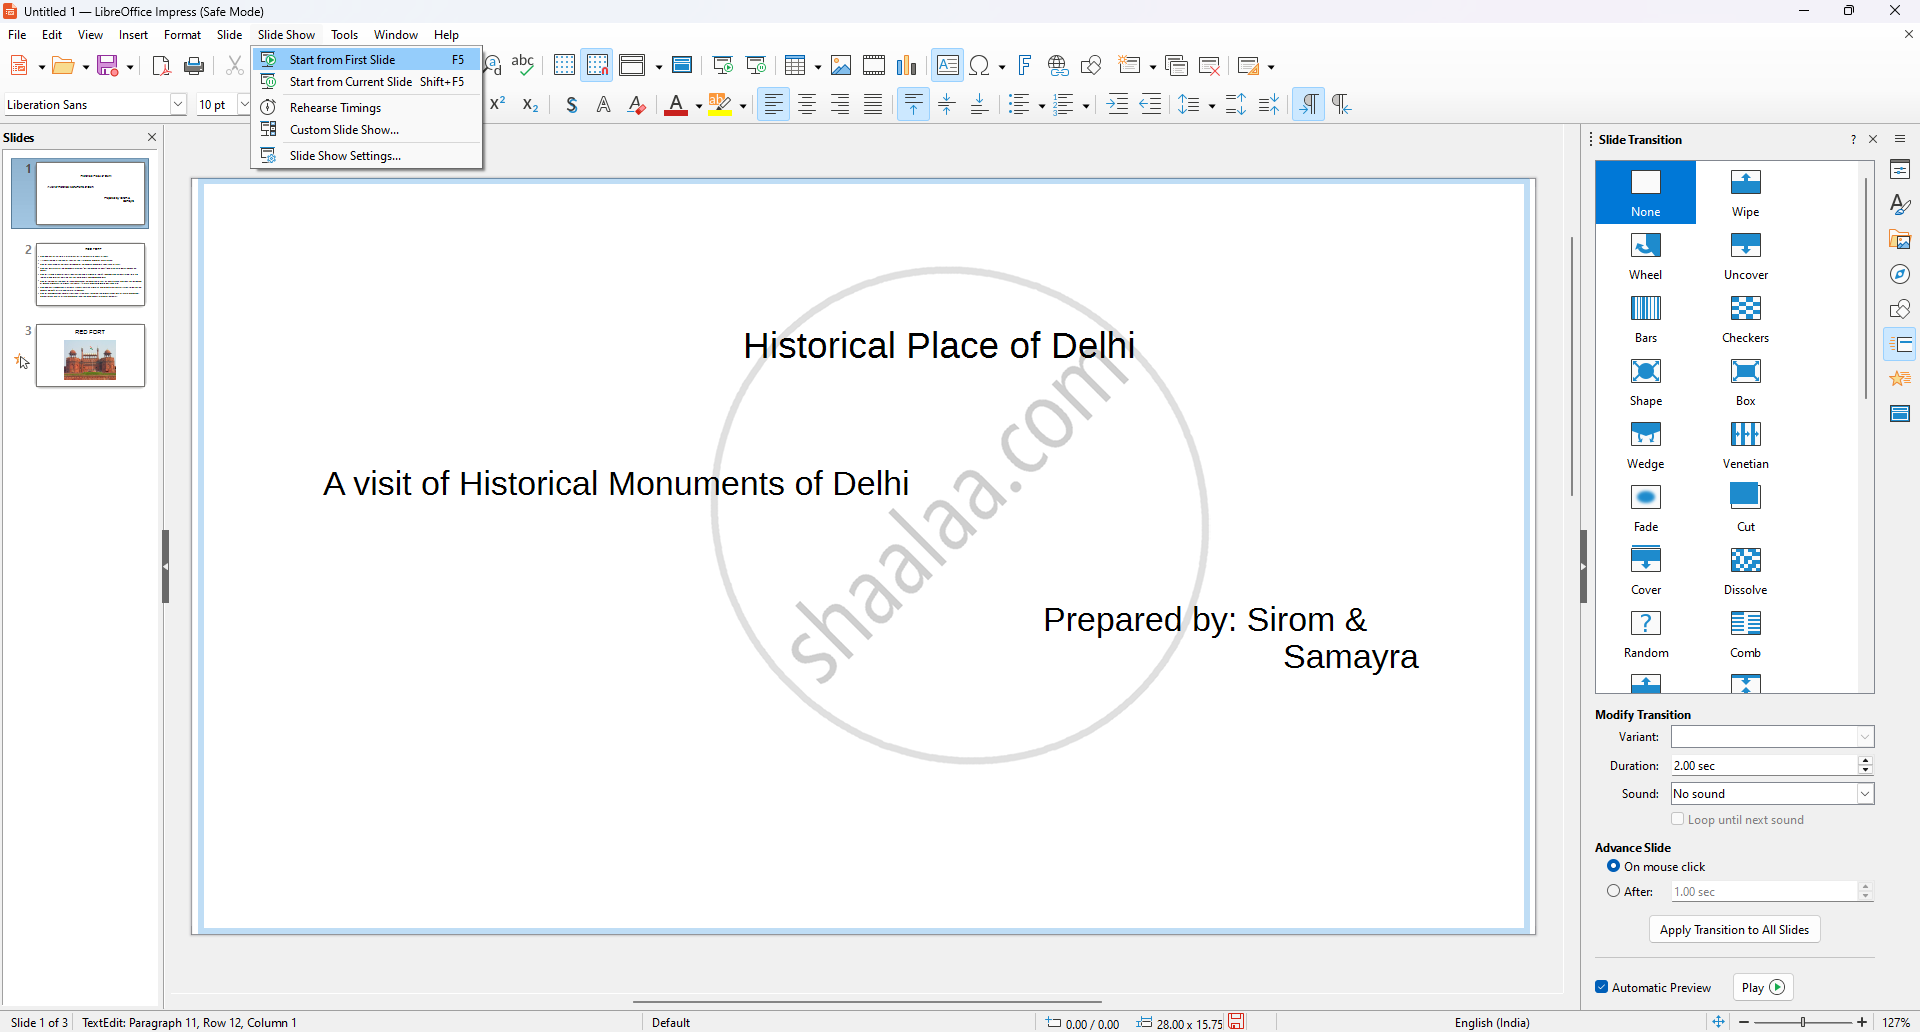
Step 1 : On top of the Menu Click on Slide Show → Click on Start from first Slide (F5) Slides will be presented one by one.
Step 2 : For more additions to the slide presentation and to make it more attractive, from the top bar menu, click on Slide → Slide Transitions. Choose the transitions required in slides and can adjust time, sound, variant, etc.
2. Navigating in slideshow
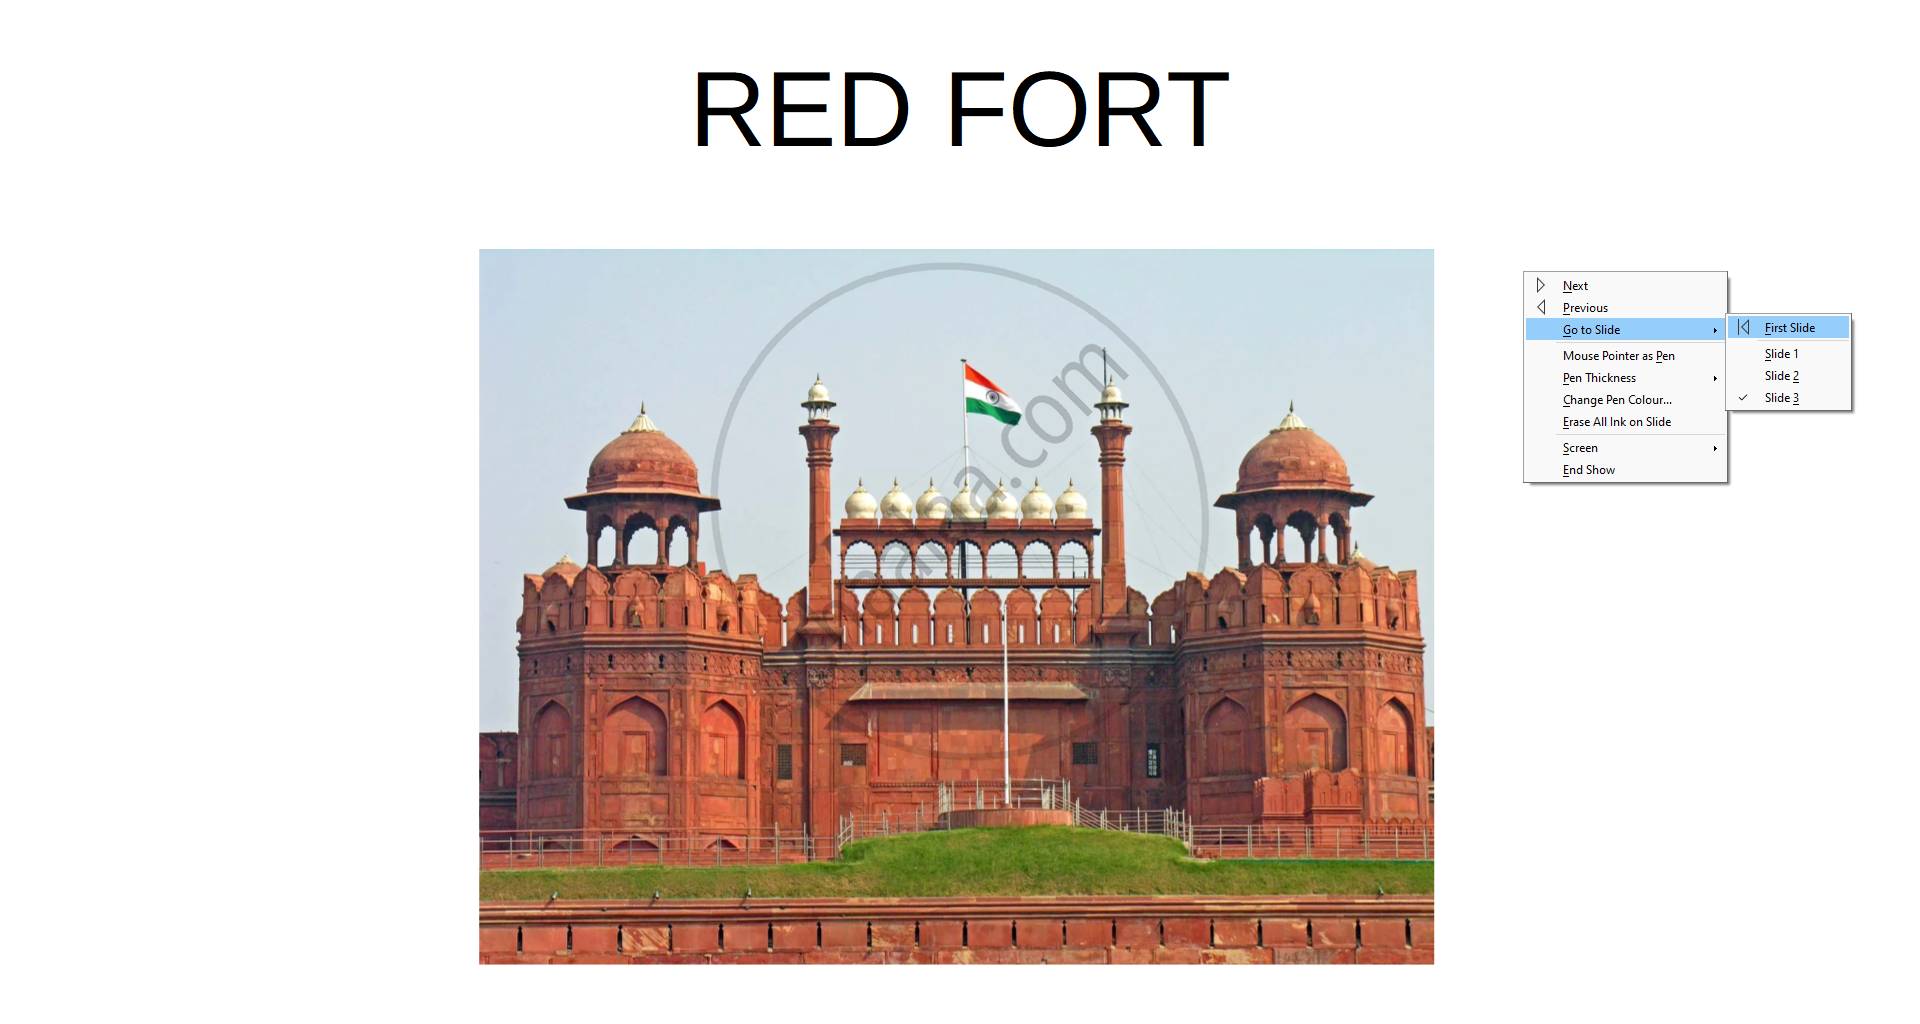
Step 1 : Click on F5 to start a slide show.
Step 2 : Then right-clicking anywhere on the screen brings up the floating menu that allows navigation of the slides.
Floating Menu Options as Follows :
- Next/Previous: Navigate to the next or previous slide.
- Go to Slide: Jump to a specific slide (e.g., First Slide, Slide 1, Slide 2, etc.).
- Mouse Pointer as Pen: Turn the pointer into a drawing pen.
- Pen Thickness: Adjust the thickness of the pen tool.
- Change Pen Colour: Select a different pen colour.
- Erase All Ink on Slide: Remove all pen annotations from the current slide.
- Screen: Options for hiding or showing the screen temporarily.
- End Show: Exit the slideshow.
3. Slide Sorter View
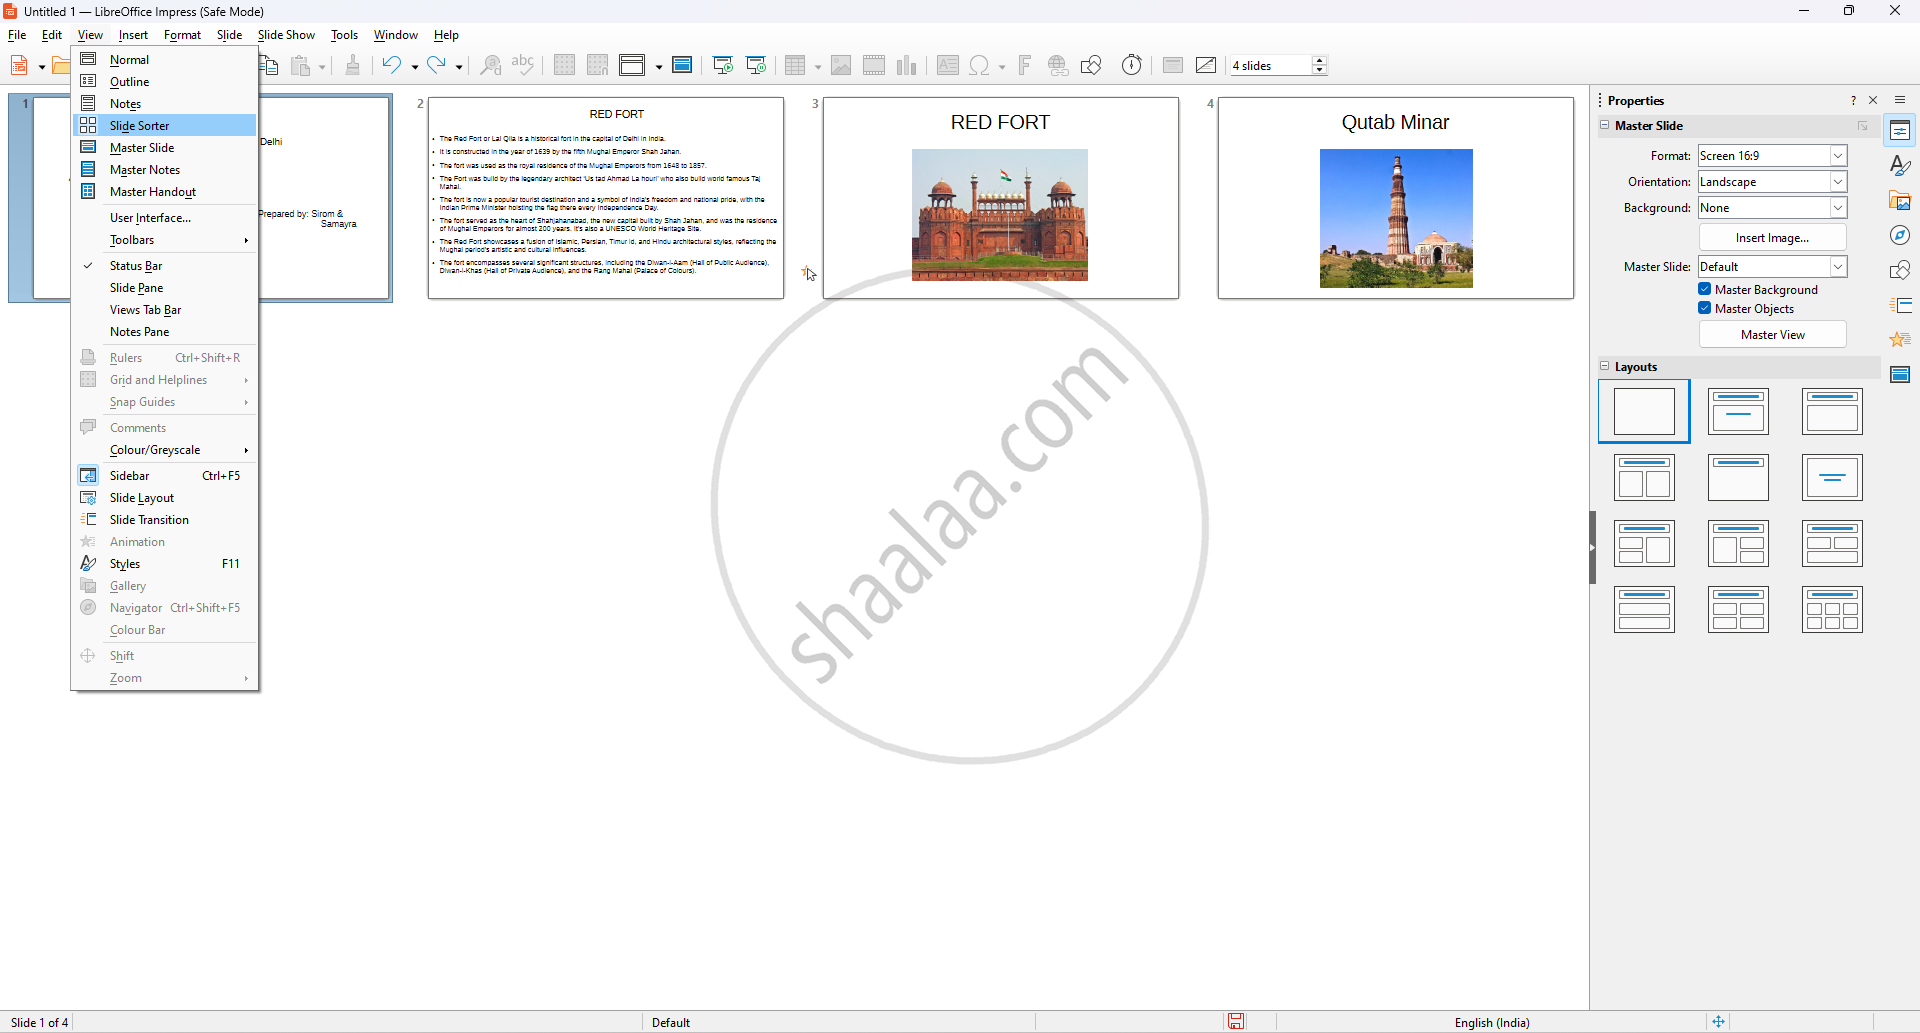
Step 1: On top bar menu Click on View → Slide Shoter View. The pages will appear on one page, and the user can arrange the pages according to the requirement.
4. Exporting as PDF
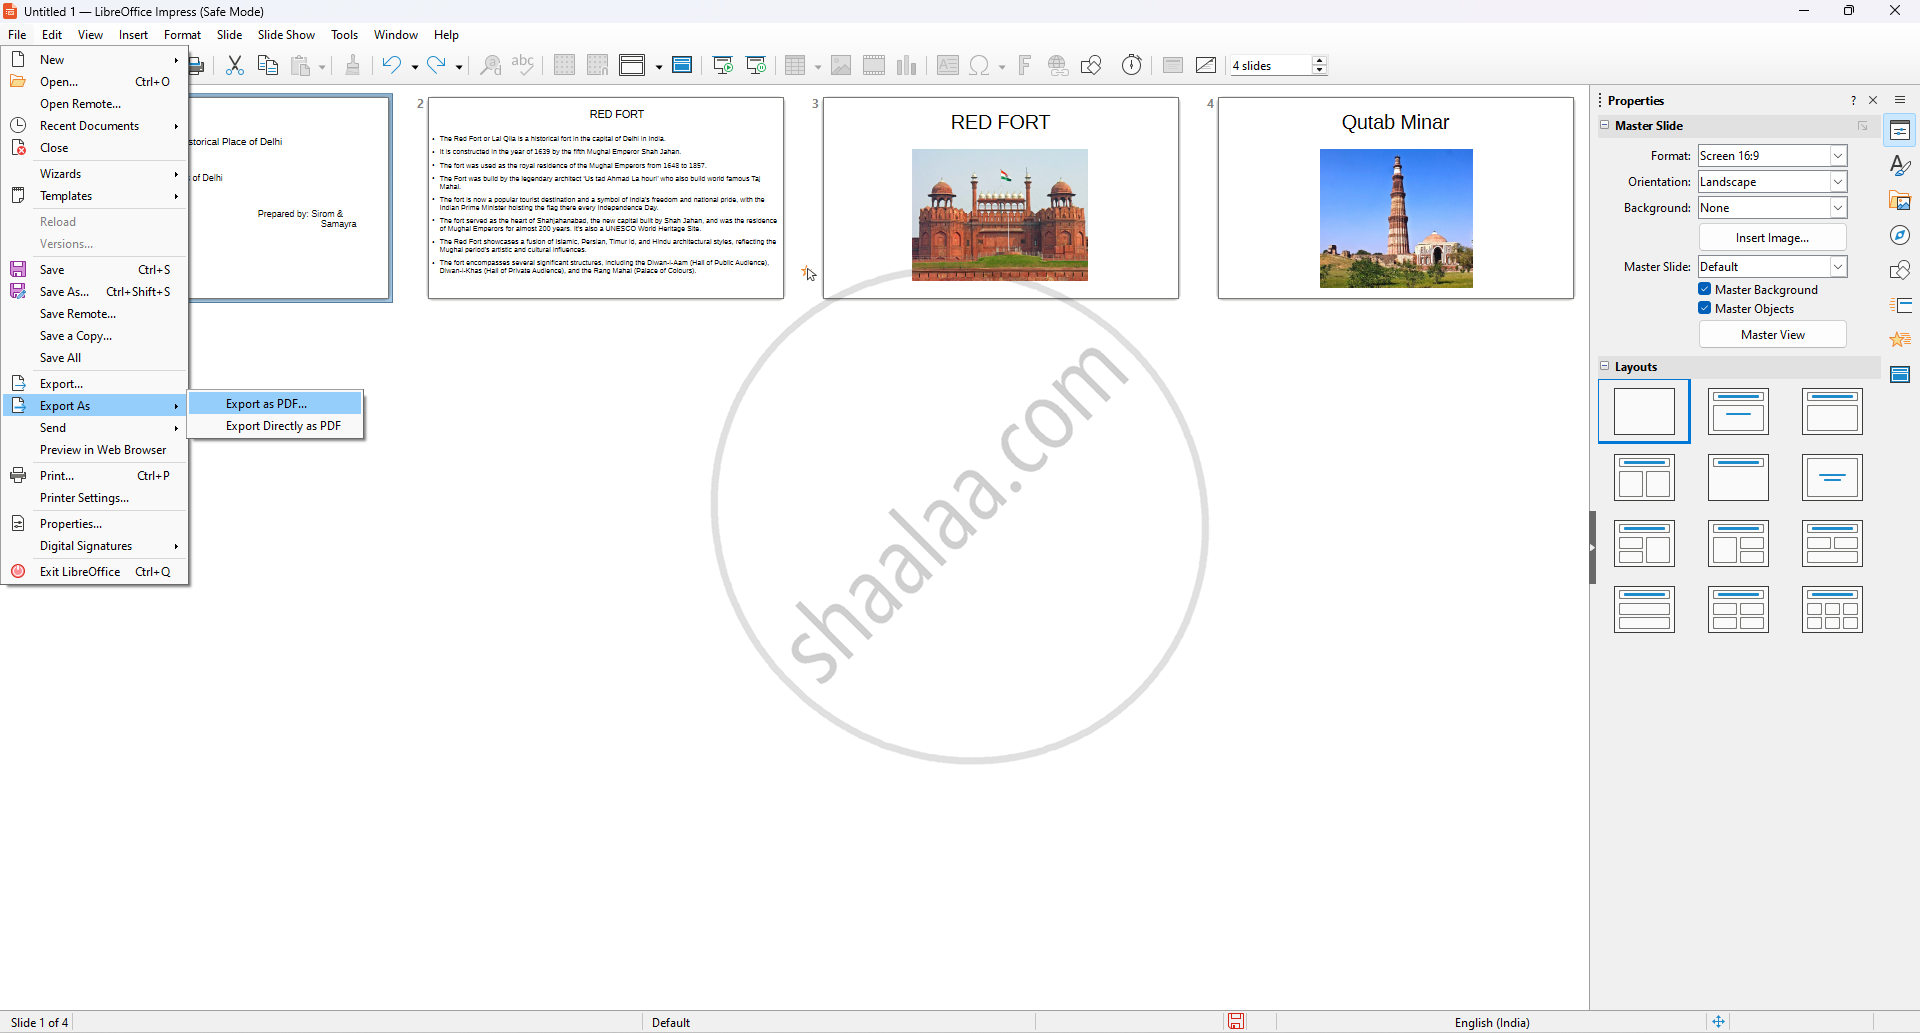
Step 1: On top bar menu, click on File → Export As → Export as PDF or export as PDF directly. The presentation will be converted into PDF document form.
PDF stands for Portable Document Format. It is a file format developed by Adobe. which is an open standard file format for file viewing, and send it to someone. It presents documents in a manner independent of application software, hardware, or operating systems.
